Thursday, December 27, 2012


VALENTINES DAY - LONG CHARM DANGLES ALL LACE AND RIBBON
I used a few of the Giant Rhinestone Wheels for a Project and had so many left over, just wasn't sure what to do with them so I came up with some long dangles that can be used on key chains, belt loops, backpacks, gift baskets, dressforms ... just anything! They're so much fun, love playing with mixed media. Here's a few examples, I'm working on some "wedding" ones right now.
 |
| Just in time for Valentine's Day - this one is about 7-8 inches long. |
Monday, December 10, 2012
Steampunk Ornament (Over Embellished !) Top Hat for Christmas

I add one ornament to the tree EVERY year (sometimes more than one) that captures my eye, usually something with a Victorian flair. Over the last couple years I've fallen in love with all things steampunk but haven't found any steampunk ornaments in our Idaho stores so I decided to make one!
I went to our local Wal-mart and for $1.98 there was this darling black glitter, styrofoam/top hat with a chipboard rim. It was cute as is, but I never could leave well-enough alone.
In a steampunk tag swap earlier this year one of the ladies alcohol inked a bottle cap and filled it with little clock parts. It accidentally got bent before I could use it in a mini but I salvaged the amazing embellishments to use later. Clipping a few red holly leaves from a red glitter Christmas pick I added those.


Went through my steampunk embelly stash and added some washers, gears, nuts and found parts that I had removed from a broken video camera and added those. I used hot glue (just a little touch) to hold the items initially in place but also added mostly Glossy Accents to hold better. The hot glue is just a tiny dab so they could be placed vertically and still hold until the Glossy Accents could dry.

I also replaced the chincy little silver string with a chain and put the tip of the Gloss Accent bottle in the hole that has a piece of wire and squeezed in a good drop to keep the chain better supported.
I had a few Steampunk Stickpins that I had put together this summer and stuck them in around the gears and again, reinforced with Glossy Accents down the portion of the stick pin that went into the hat. After that, for a finishing support, I cut a few pieces of wire and bent it closely around some of the heavier nuts and steampunk embellies to make sure they stayed put.

You can see the wire around the copper coil on the top of the hat - I ran a gold leafing pen over the wire so it would fit in better. Also some charms are attached with wire (like this skull wreath charm. I touched it with Ranger Patina to give it that turquoise tarnished look. The little gear that is wire wrapped and those beside it I used the same technique of add just a dab of hot glue to place them, then Glossy Accented them in place.
Clipped a hole in the side and ran a chain and key to add some length and voila - instant steampunk ornament.
Thought of making a few for sale but realized it was only 15 days till Christmas!!!! Guess I better get on it faster for next year!!!
Hope your HOLIDAYS ARE HAPPY!!
Saturday, November 17, 2012
Santa Claus is Coming to Town Charm Dangle and Tag
I've been so worried about my son's sight (won't go into health issues here) that I haven't achieved near what I wanted by this time of the season ... Christmas is ONLY a little over 5 FIVE weeks away! Time is flying by us.
Making this Dangle inspired by the song "Santa Claus is Coming to Town" lifted my spirits and left the tune ringing through my mind - I don't think I want it to leave yet. When I realize I'm humming it, I get happy and start thinking about making Christmas cookies.
I have enough supplies to make a couple more similar to this one. If you're interested in ordering some before Christmas, let me know ASAP ... The cost would be $17 each or 2 for $30. Shipping is FREE in the continental USA or $8 for most International Shipments. Just send me an email to PutTheGlueDown@gmail.com and I'll send you my PayPal link. I need at least 2 weeks before Christmas to get them to you on time.
Making this Dangle inspired by the song "Santa Claus is Coming to Town" lifted my spirits and left the tune ringing through my mind - I don't think I want it to leave yet. When I realize I'm humming it, I get happy and start thinking about making Christmas cookies.
 |
| The two Santas on the right are Jingle Bells!!!! |
Tuesday, November 6, 2012
Autumn / Fall Inspired Bead Charm Dangle
Despite some family health situations, I managed to get this Autumn inspired dangle completed. It really put me in the mood for Thanksgiving and Giving Thanks :)


I used just a basic clip, the initial start piece for the dangle was a "redirected" earring and since the silver leaf charms and split rings didn't quite match the color scheme I touched them up with a copper leafing pen. The huge metal leaf charm at the bottom is almost 2" long. The boarders, acorn and gourd is from K & Co. and the embossing powder for the leaf stamp on the tag is Stampin'Up. For an eye catcher I used a small jade bead in the center of the dangle.
Wednesday, October 31, 2012
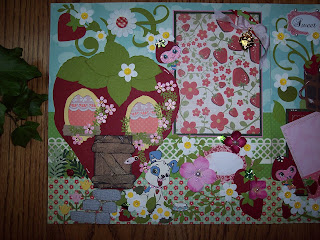
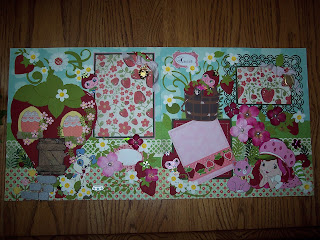
Old Stuff for the Files ... Mulan, Smurfs, Strawberry Shortcake
Since I'm totally deleting my other old files, just wanted to copy a few pictures of past crafts that were either sold or filed away that had a special place in my heart.
 Valentine Shadowbox Card with Rhinestone metal frame, the handmade red rose would later adorn the gift box for the card.


The Smurf movie brought back some teenage memories ... yep dating myself.
I handdrew and handcut each of these Smurfs and the mushroom house. The rainbow is a diecut from Quickutz I believe.
These Strawberry Shorcake and Mulan Pages were some of the most fun I've ever had at creating paper piecings. I remember drawing Strawberry's dog and cat and cutting out the parts when my niece, Amber, came over and told me that I had the colors "totallllllly wrong" - she had been a crazed Strawberry Shortcake fan, so it was changed. You always need to know when to listen to the experts!!! Mulan's face was the most difficult piece I've ever created. I remember drawing and redrawing her face until I was ok with it. .... about 12 times!


My son was a little speed demon in 4th grade with his buddies and you know I had to scrapbook that !!


and last but not least Cooking with Momma pages, my attempt at tearbears!

Milk Carton UpCycled to Fairy House
 This mild mannered milk carton was transformed into a fun little fairy house earlier this year. If it looks familiar, I had it on a previous blog before I started this one. A friend asked me to move it over so here it is.
 It was fun to make a place where fairies could feel safe and sound from the world.

The paper used is a combination of Graphic 45, BoBunny, and Bazzill. The large flower I created from a wooden bead (inside the center), Martha Stewart Snowflake Punch (as a base behind the flower) McGill punches, and some handcutting. Metal gears are Tim Holtz as are the die cut gears. The metal charms, including the fairy are Tibetan charms and made gold by applying gold leafing. Smallest metal gears are from Eyelet Outlet and I clipped off the brad stem and slightly aged them with Adirondack Alcohol inks. Sticks on the door and the chimney are from an old grapevine wreath.
 The little robin eggs are only about 1/4 inch.

The bee charm is approximately 2.5 inches.
 Chipped clear blue glass covered in Glossy Accents made the stream running outside the door. The jumping fish is a charm with the charm connector removed with a wire cutter.
 3-D Steampunk stickers down the sides and gold swirls are Jolees.

 The back I tried to keep simple so it could be easily
displayed on a shelf.
 Roof is a piece of scrap chipboard painted and then mottled with Adirondack alchol inks buy Ranger (Tim Holtz).
Greenery is pieces of floral arrangements that wouldn't miss a few pieces :)
\
What are you waiting for??? Grab a milk container and make a Christmas House, Halloween House, or something fun! Don't forget to posts your pix! Have fun.
Wednesday, September 19, 2012
Getting Ready for Seasonal Crafting
This morning these online photos reminded me of my West Virginia roots. Waking to a brilliantly lit room of the sun shining through a chilled, glass world. One of the elusive times of true silence in this busy world. The power out, the world caked in thick, clear ice, the only sounds are the humming from your own mind trying to comprehend the muted world and the occassional cannonade crash of a tree falling somewhere in the forest from the weight of the ice, sounding like some vehement monster stepping your way. I'm in Idaho now, there's never an ice storm. Yearning now to be in my West Virginia wilderness, staring over a bright, snow covered forest where a neighbor is only seen by the distant smoke coming from a chimney several mountains over. Still, the cold in this desert is urging me to start the Halloween and Christmas crafting time ... the best crafting time of the year.


Tuesday, September 18, 2012
CHUNKY Charm Dangles
DANGLES DANGLES DANGLES


 Been doing quite a few things over the summer but life got a little too busy and didn't get to post many. Don't forget that I do make dangles FOR SALE as well. Just send me a message. Most BIG CHUNKY dangles range from $12 - $25 and use predominately glass beads and come with some sort of decorative presentation (tag or box). The more you order the cheaper they are. Here's a few examples (also if you want them soldered it's additional)
I have a few swaps to get caught up but will be adding more photos soon!!
 |
| Think Grandma looking stuff :) |
 |
| This was an inspiration tag and on the back was a list of what each charm represented for the person receiving it. For instance the rhinestone carriage and slipper represented her "ROYAL HERITAGE - to inspire her to return to her Father living the way she knows would make Him proud" the "SCISSORS represent that after many tries to know when to sever damaging ties." |


I have a few swaps to get caught up but will be adding more photos soon!!
Saturday, July 21, 2012
Captured Fairy in a Jar with Resin Waterfall and Nightlights
I did my first YouTube video (EVER) on this jar - very amateur and not well done lol but if you want to see it, it's at : http://www.youtube.com/watch?v=0UwNJ4pfvGg&feature=g-upl
Meet Alainn! On her tag is written: "Afraid and far from home, Alainn went into the basement of an old house in the desert area of Idaho where I found her causing mischief. She was playing in the current of a strong wind and was swept far far from her home. She remembers the lush green of home and the rains that fell so plentifully so I am sending her to you in Ireland so she can again be blissful. She is an enchanting fairy capable of very strong majik that helps your dreams become fulfilled. She can come and go as she pleases but will always be with you when you're awake. You will know when the time is right to pass her to another who needs their dreams to come to fruition. Her majik is powerful. She even helped make Cinderella's slippers." (The tag is covered in acrylic pink, crackle medium, silver paint, and a thick layer of enameling resin over the writing).


Well, I hope she makes it to Ireland safe and sound. Her new owner Niamh, from Life on the Scrapbeach has been waiting should give her a loving new home and she told us on the LOTSB site that she had recently seen a "real" fairy circle during a recent walk, so Alainn should feel right at home with her.
Meet Alainn! On her tag is written: "Afraid and far from home, Alainn went into the basement of an old house in the desert area of Idaho where I found her causing mischief. She was playing in the current of a strong wind and was swept far far from her home. She remembers the lush green of home and the rains that fell so plentifully so I am sending her to you in Ireland so she can again be blissful. She is an enchanting fairy capable of very strong majik that helps your dreams become fulfilled. She can come and go as she pleases but will always be with you when you're awake. You will know when the time is right to pass her to another who needs their dreams to come to fruition. Her majik is powerful. She even helped make Cinderella's slippers." (The tag is covered in acrylic pink, crackle medium, silver paint, and a thick layer of enameling resin over the writing).
 |
| She's a NIGHTLIGHT!! I couldn't resist adding a string of rice wedding lights throughout the jar. |
 |
| Front View - taken outside cuz it's too dark in my craft spot. |
 |
| Two rows of vintage lace and a BIG OLE Prima Flower with an added piece of antiqued filigree, acrylic crylic flowers and some crystal dangles to give it a little bling. |


 |
| Part of her story is that she helped create Cinderella's glass slippers so I used this plastic slipper, drilled a hole in it and added a filigree butterfly. The midsummer nights fairy dangle that is in another post on this blog is now home with the fairy jar. |
 |
| This is my FAVORITE part - theWater Spirit! I let resin drip to look like a waterfall, cut it out of the plastic cup I formed it in, added some Sail Boat Blue Adirondack Alcohol Ink to the back, molded a resin face and attached it (more on the pool under the fall below). |

 |
| I purchased this pick of raspberries from JoAnn's but found so many of the little red beads in the bag when I got home that I was afraid they wouldn't deal well with time or shipping so I coated them all over with Glossy Accents. LOVE THAT STUFF! |
 |
| Under the resin Water Spirit Waterfall is a little pool that I made from tiny pieces of broken blue and white glass, covered in Glossy Accents and held a little Bronze Mermaid Charm in place till she dried. Added a little bronze seashell to the moss rock behind her. The seashell isn't even as big as a dime so you can get the idea of the size. |
 |
| "Sort of" runs together smoothly. The big flowers inside the jar (besides the crystal ones) are from Prima. |


 |
| She seems to be starting to get a serene look on her face (for a Christmas Ornament she's pretty in purple huh?) |
 |
| I also molded a bird out of clear resin and attached it to the gold glitter vines (they're off Christmas picks from JoAnn's btw). |
Well, I hope she makes it to Ireland safe and sound. Her new owner Niamh, from Life on the Scrapbeach has been waiting should give her a loving new home and she told us on the LOTSB site that she had recently seen a "real" fairy circle during a recent walk, so Alainn should feel right at home with her.
Subscribe to:
Posts (Atom)